Guide Xen Cloudmin/en
Aus EUserv Wiki
| | Languages: |
Deutsch |
Guide Xen 4.0 with Cloudmin 6.6
Inhaltsverzeichnis |
Guide Xen 4.0 with Cloudmin 6.6
General
EUserv offers a Debian Squeeze with Xen 4.0 and the admin panel Cloudmin 6.6 for a fully-automatic installation on a dedicated root server. This can be used for an uncomplicated way of creating and managing virtual machines. All steps necessary to set up your server with Debian, Xen and Cloudmin (as well as creating virtual machines) are listed hereinafter.
Preparing the installation
To install Debian with Xen and Cloudmin on your server please proceed as follows:
- Log in to the EUserv customer center.
- Select your server contract and click Re-Installation in the left menu.
Now choose the Debian 6.0r0 (Squeeze) - 64Bit - XEN4 from the OS list (Standard or Raid1) and click Reinstall ausführen below. Don't forget to mark Bestätigung Reinstall. The reinstallation will now be processed. The installation should be completed after approximately 30 minutes. You can have a look at the installation state under Server Data.
Managing VM's with Cloudmin
Connecting with the server
To connect with the graphical administration panel Cloudmin open your browser and enter the following URL:
https://<your-server-IP>:10000
Keep in mind to use https instead of http - the connection with Cloudmin is SSL-encrypted.
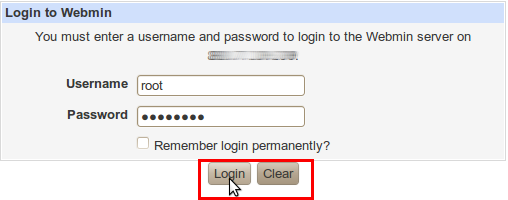
After that you will be prompted to enter your credentials; enter root as the user name. The corresponding password is the Default-Passwort which can be found in the section "Customer Data" in the EUserv customer center. Confirm your input by clicking Login:
After the successful login you are now in Cloudmin's main menu:
Here you can read the current server load as well as other system parameters.
Loading operating system images
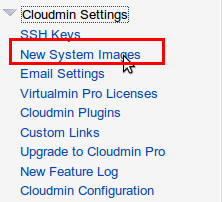
Cloudmin provides a variety of Linux OS-images which are already compatible to Xen. The image will be stored permanently on your server, making it possible to create many VM's of the same kind. In order to download an image just click Cloudmin Settings and New System Images in the left menu:
You will now be presented with a selection of available OS-images. To load a certain image just mark the check box to the image entry and choose Download Selected Image. In this example we will choose CentOS 5.4 instance with base OS - The download process will be displayed here:
Creating virtual machines
Select New System and Create Xen Instance from the left menu. You will now be redirected to the configuration mask for the VM's. Here you may now apply the following settings:
1- Internet Hostname: Enter the name of the VM (the VM will be reachable under that name).
2 - Cloudmin System Image: Choose the OS-image that is supposed to be installed from the drop-down menu.
3 - SSH Login Mode: Here you can choose how to connect with the VM via SSH - either via Password or using a dedicated SSH Key
After having applied the general setting you will now have to configure the ressources and the network:
1 - You can assign a certain amount of RAM to the VM. Moreover you can set the size of the virtual hard disk and the swap space. Additionally you can state how much percentage of the physical CPU and how much network bandwidth can be shared with the VM.
Now it's time to configure the network of the virtual machine. Enter the IP address and the corresponding netmask under 2 under which the VM is supposed to be reachable. Under 3 enter the appropriate Gateway. In case you are not familiar with this procedure, a tutorial on how to assign IP addresses in the EUserv customer center can be found here:
https://www.euserv.com/wiki/index.php/Kundencenter_Server_IP_Adressen/en .
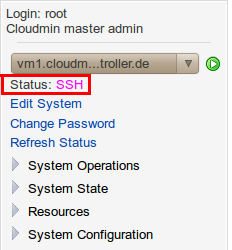
By clicking Create System the VM will be created. This procedure may take up to 2 minutes (depending on the selected image). Cloudmin will give you feedback about the current state of the system. Once the system has been created and started the state SSH indicates accessibility of the VM:
The virtual machine can now be accessed with
ssh root@<IP-of-the-VM>
Access with the internal VNC console
Beside the remote access using SSH Cloudmin also provides managing the VM with VNC. To use this feature select the desired VM from the drop-down menu in the upper left corner:
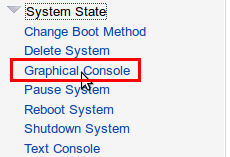
Click System State --> Graphical Console:
After confirming your browsers security prompt you will see the graphical output of your VM via VNC:
Cloning a VM
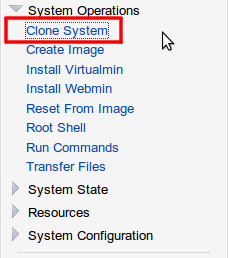
To create an identical copy of a virtual machine Cloudmin offers the Clone System feature. Select System Operation --> Clone System from the left menu:
Now you can set the hostname as well as the IP address of the VM. Click Create Clone subsequently:
Additional system operations
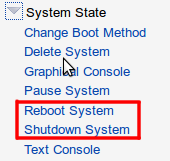
Virtual machines can be shut down or restarted. This can be achieved by clicking Reboot System resp. Shutdown System under System State:

