Manual Konfiguration iPhone iOS 9/en
Aus EUserv Wiki
Version vom 13:11, 16. Okt. 2015 bei Svtr1 (Diskussion | Beiträge)
| | Languages: |
Deutsch |
Setting up email account on iPhone under iOS 9
Inhaltsverzeichnis |
Setting up email account on iPhone under iOS 9
Setting up the email account
To setup your email account on your iPhone under iOS 9, please proceed as follows:
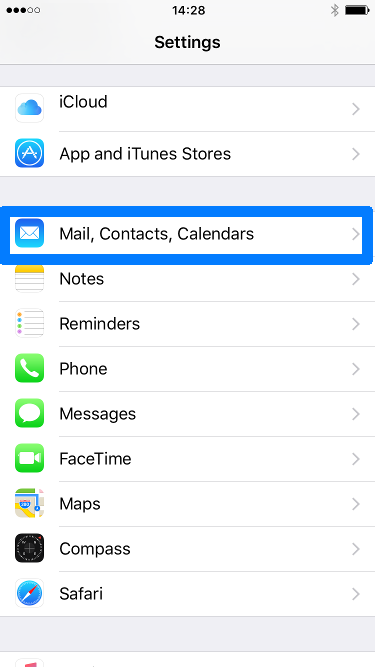
- Tap under Settings on Mail, Contacts, Calendars.
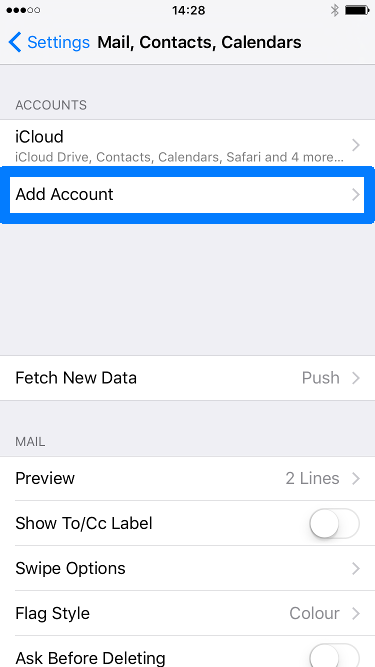
- Tap on Add Account to add your account:
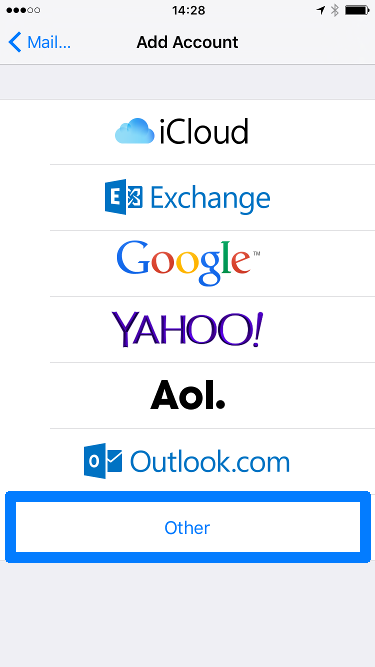
- Tap on Other
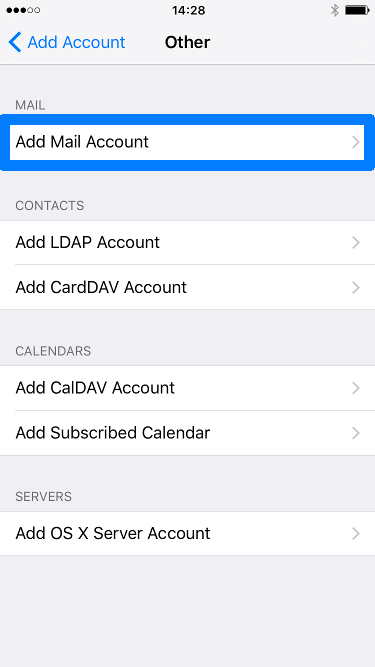
- Tap on Add Mail Account.
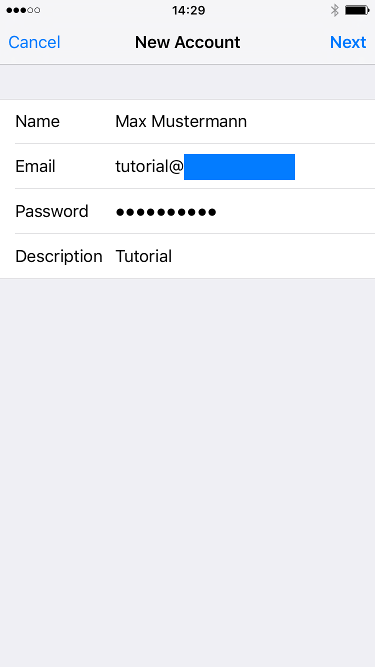
- Enter your account information and tap on Next.
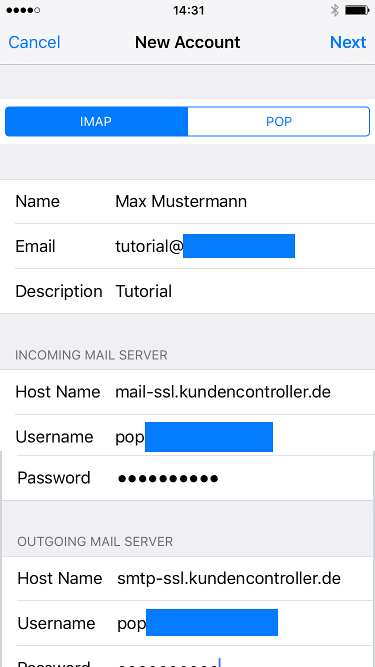
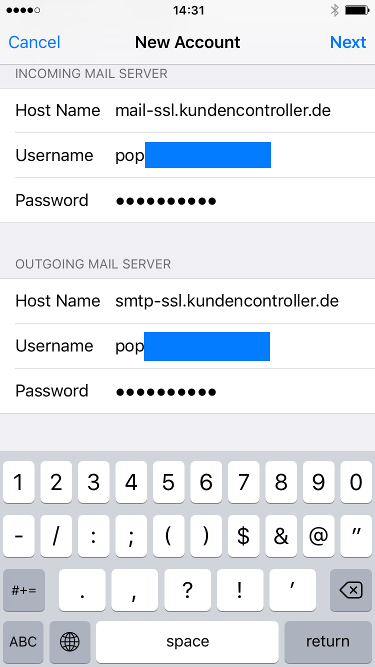
- Enter under INCOMING MAIL SERVER your username, your password and the hostname mail-ssl.kundencontroller.de.
- Enter under OUTGOING MAIL SERVER your username, your password and the hostname smtp-ssl.kundencontroller.de.
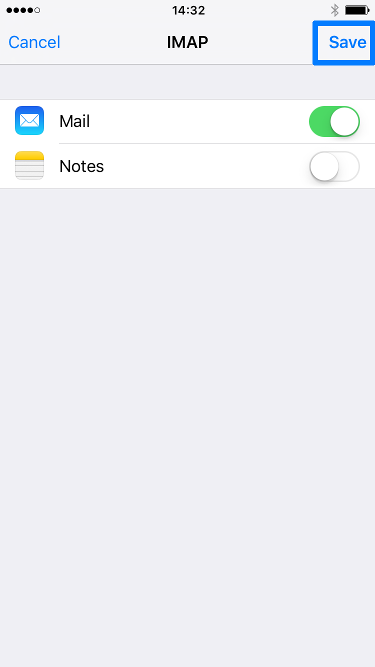
- To finish the setup, tap on Save.
Showing the mailboxes
To show your mailboxes, please proceed as follows:
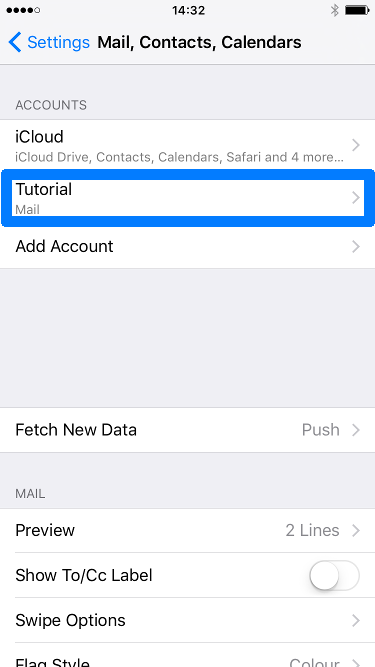
- Tap under Settings on Mail, Contacts, Calendars.
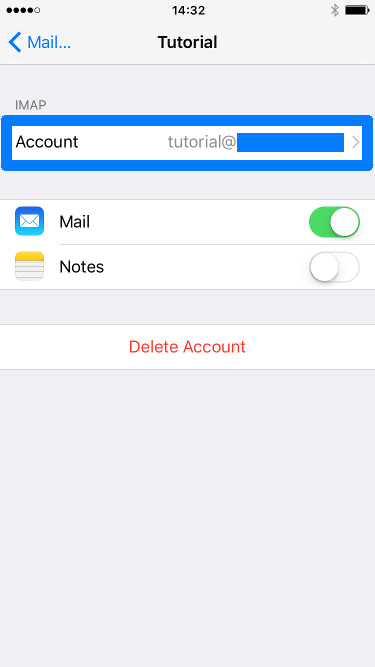
- Select your email account.
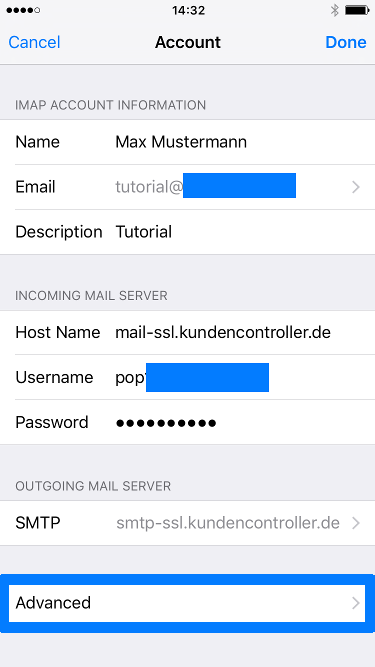
- Tap on your user account.
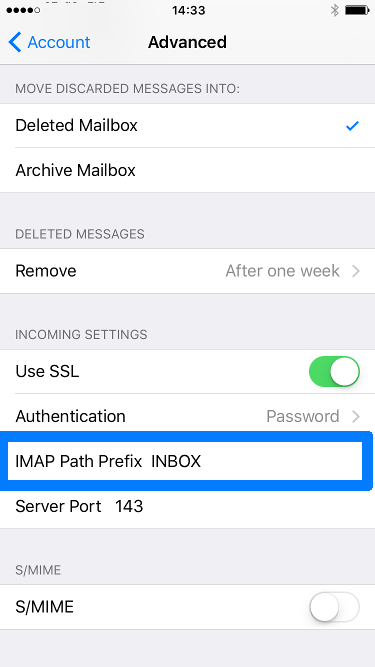
- Tap on Advanced.
Enter INBOX under IMAP Path Prefix and check if server port is set to 143.
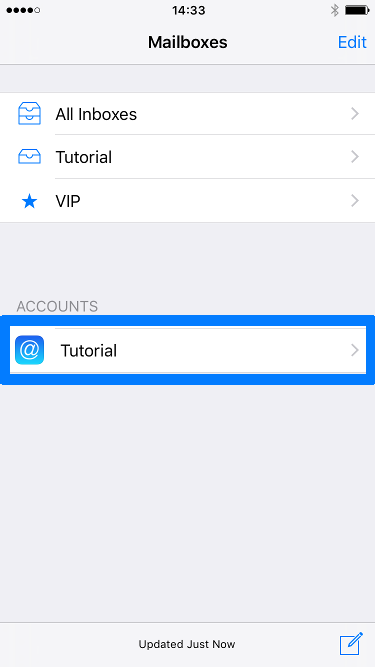
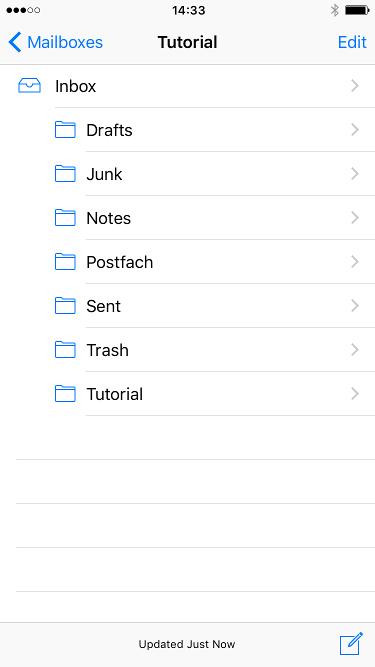
- Open the app Mail and choose your account.
- Now your mailboxes are visible.

