Manual API Controller/en
Aus EUserv Wiki
| | Languages: |
Deutsch |
API Controller Manual
Inhaltsverzeichnis |
API Controller Manual
Program start
Login
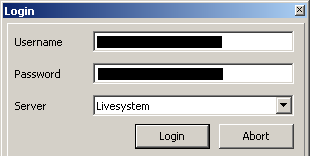
When starting the program for the first time you have to enter the data of your API-user first in order to log in. To do so enter the name and password in the respective fields. You can choose between live and sandbox system from the drop down box below. Next click on “login” to confirm your data. If the entered data is correct your contract data will be downloaded and can be found in the respective tabs. Please note that, depending on the amount of your contracts and the connection speed this may take a while. After a successful login your user data will be saved so you don't have to reenter it again.
Change Login Data
Open the menu “Connection” on the main window and chose the item “Change login data”. In the now opened window you can change the user or log in again with your current data.
Chose a Contract
To make changes on the server/domain you wish to, open the appropriate tab on the top border of the main window directly below the main menu. In the now displayed overview you can chose your contract from the list on the left. It may also take a while till the contract data is loaded completely this can vary depending on your connection speed and the contract type. When all data has been loaded you can see and change it using the tabs on the right.
Server-Contracts
You can reach the server-contract overview in the tab “Server contracts”
Overview Server Data
In the tab “Server data” you can see all relevant data about your server.
Traffic-Graphs
In the tab “Traffic graph” you can get an overview about the incoming and outgoing traffic of your server. With the box in the upper area of the view you can chose over which period the graph should be displayed.
Live-monitoring-Data
In the tab “Live monitoring” you can see the current status of your server.
Server Restart
To restart (hardreset) your server chose the tab “Premium webreset”. After you checked your server data, click “execute reset”.
Rescue-System
To activate the rescue-system for a server chose the tab “Rescue-system”. Before activating the rescue-system you can check the filed “Server reset” to automatically restart your server after activation. Otherwise the rescue-system will be started the next time you restart your server manually. To start the desired process click on “activate”.
Installation of an operating System
To install a new operating system on a server or reinstall the existing one chose the tab “Re-installation”. In this section you can see a list of all possible operating systems available for your server, as well as the current system. Now chose the desired operating system an click “Execute reinstall” to start the installation.
Change IPv6 Data
To change the IPv6 data chose the tab “IPv6 address”. Here you can see the IPv6 address, the IPv6 gateway and the reverse entry. If you didn't already created an IPv6 address for your server you can do that here by clicking on “create” in the first line of the table. Otherwise you can change the reverse-entry of your server in the third line by typing the name in the middle field and clicking on “change” next to it.
Domain-Contracts
You can reach the domain-contract overview by in the tab „Domain contracts“.
Edit Domain-Redirects
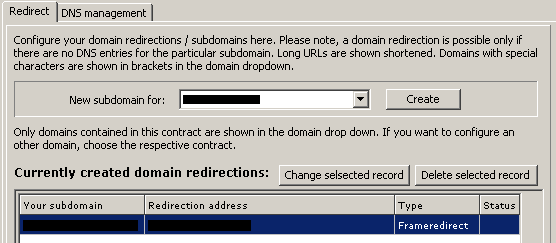
To edit the redirect records of a domain select the respective domain from the list on the left and click on the tab “Redirect” on the right . Now you can see all currently created redirect records.
Create Redirect-Records
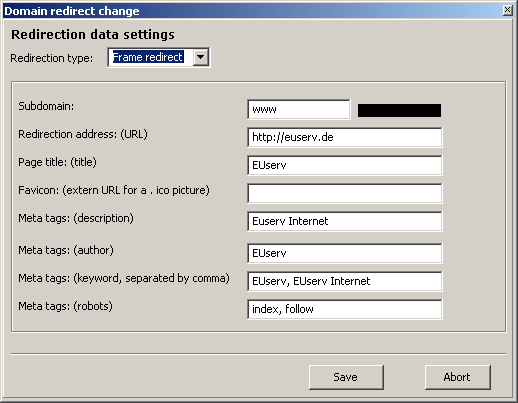
To create a new redirect click on “Create” next to the domain name. In the now opened window you can enter the data for the new redirect. Please note depending on the type of redirect different data is needed. If you completed your data and want to create the redirect click on the “Save” button. Otherwise click on “Abort” to cancel the creation.
Change Redirect-Records
To change the setting of a redirect chose the desired redirect from the list an click on “Change selected record” on top of the list. A window appears, in which you can see the data of the record and change it. Please note, it is no longer possible to change the type of the redirect.
Delete Redirect-Records
To delete a existing record chose it from the list and click on “Delete selected record” right above the list.
Edit DNS-Records
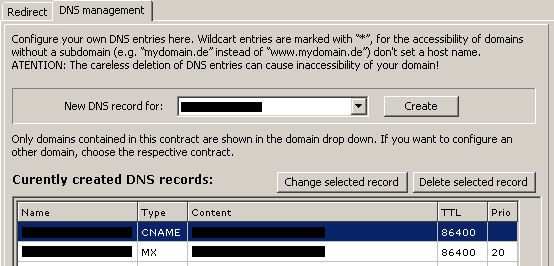
To edit the DNS records of a domain select the respective domain from the list on the left and click on the tab “DNS management” on the right . Now you can see all currently created DNS records.
Create DNS-Records
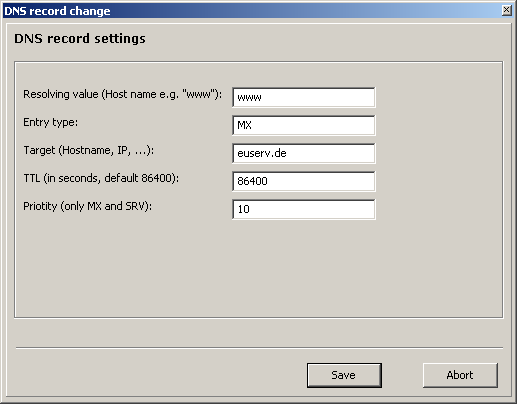
To create a new DNS-record click on “Create” next to the domain name. In the now opened window you can enter the data for the new record. If you completed your data and want to create the record click on the “Save” button. Otherwise click on “Abort” to cancel the creation.
Change DNS-Records
To change the setting of a DNS-record chose the desired record from the list an click on “Change selected record” on top of the list. A window appears, in which you can see the data of the record and change it.
Delete DNS-Records
To delete a existing record chose it from the list and click on “Delete selected record” right above the list.

